Enabling Single Sign On For Azure AD
SiteDetour supports a variety of SSO integrations for authenticating via your preferred IDP, including Microsoft Azure/Entra ID.
Overview
This article will outline the necessary steps to integrate your Azure Active Directory to SiteDetour in order to facilitate secure SSO.
Required Steps
- Verifying your SiteDetour Subscription
- Generating OAuth Client ID and Client Secret
- Updating SiteDetour SSO Configuration
Verifying your SiteDetour subscription
Please note that SSO integrations are only supported on Business and Enterprise plans. If your subscription is not Business or Enterprise, you must upgrade your plan via the SiteDetour billing page.
Generating OAuth Client ID and Client Secret
SiteDetour's Single Sign On integration with Azure AD uses the Open ID Connect protocol, which is built on top of OAuth 2. To obtain the necessary configuration settings, please use the following instructions:
1) Once logged into your Azure portal, you will need to configure what is known as an "Enterprise Application"

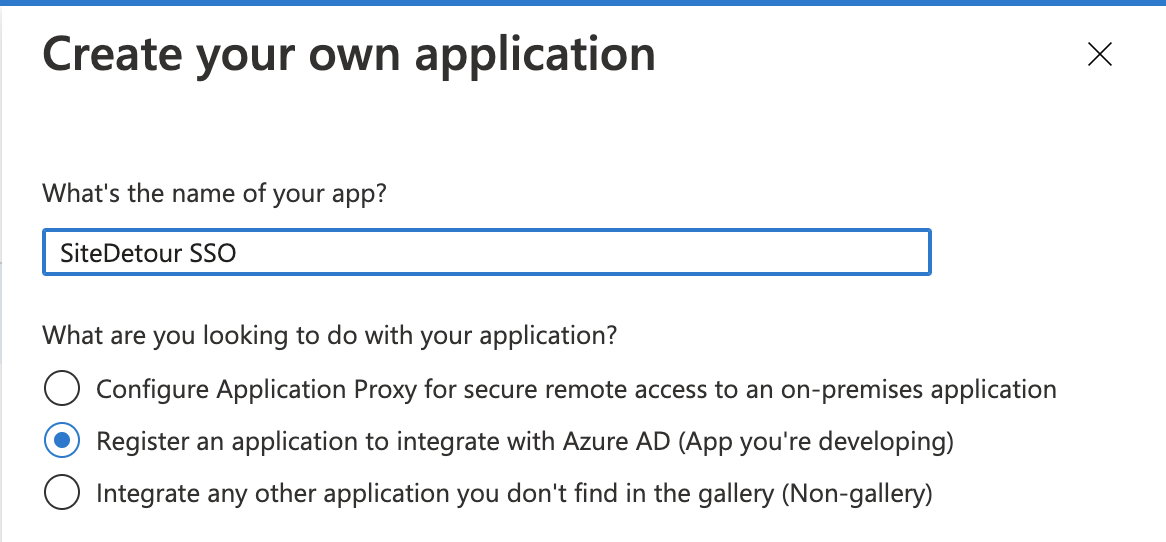
2) Add a new Enterprise Application for SiteDetour. Please note that SiteDetour will not be listed in the Azure Enterprise Apps directory, so you will need to create a new, generic app for the integration. When creating the Enterprise App, chose "Register an application to integrate with Azure AD"

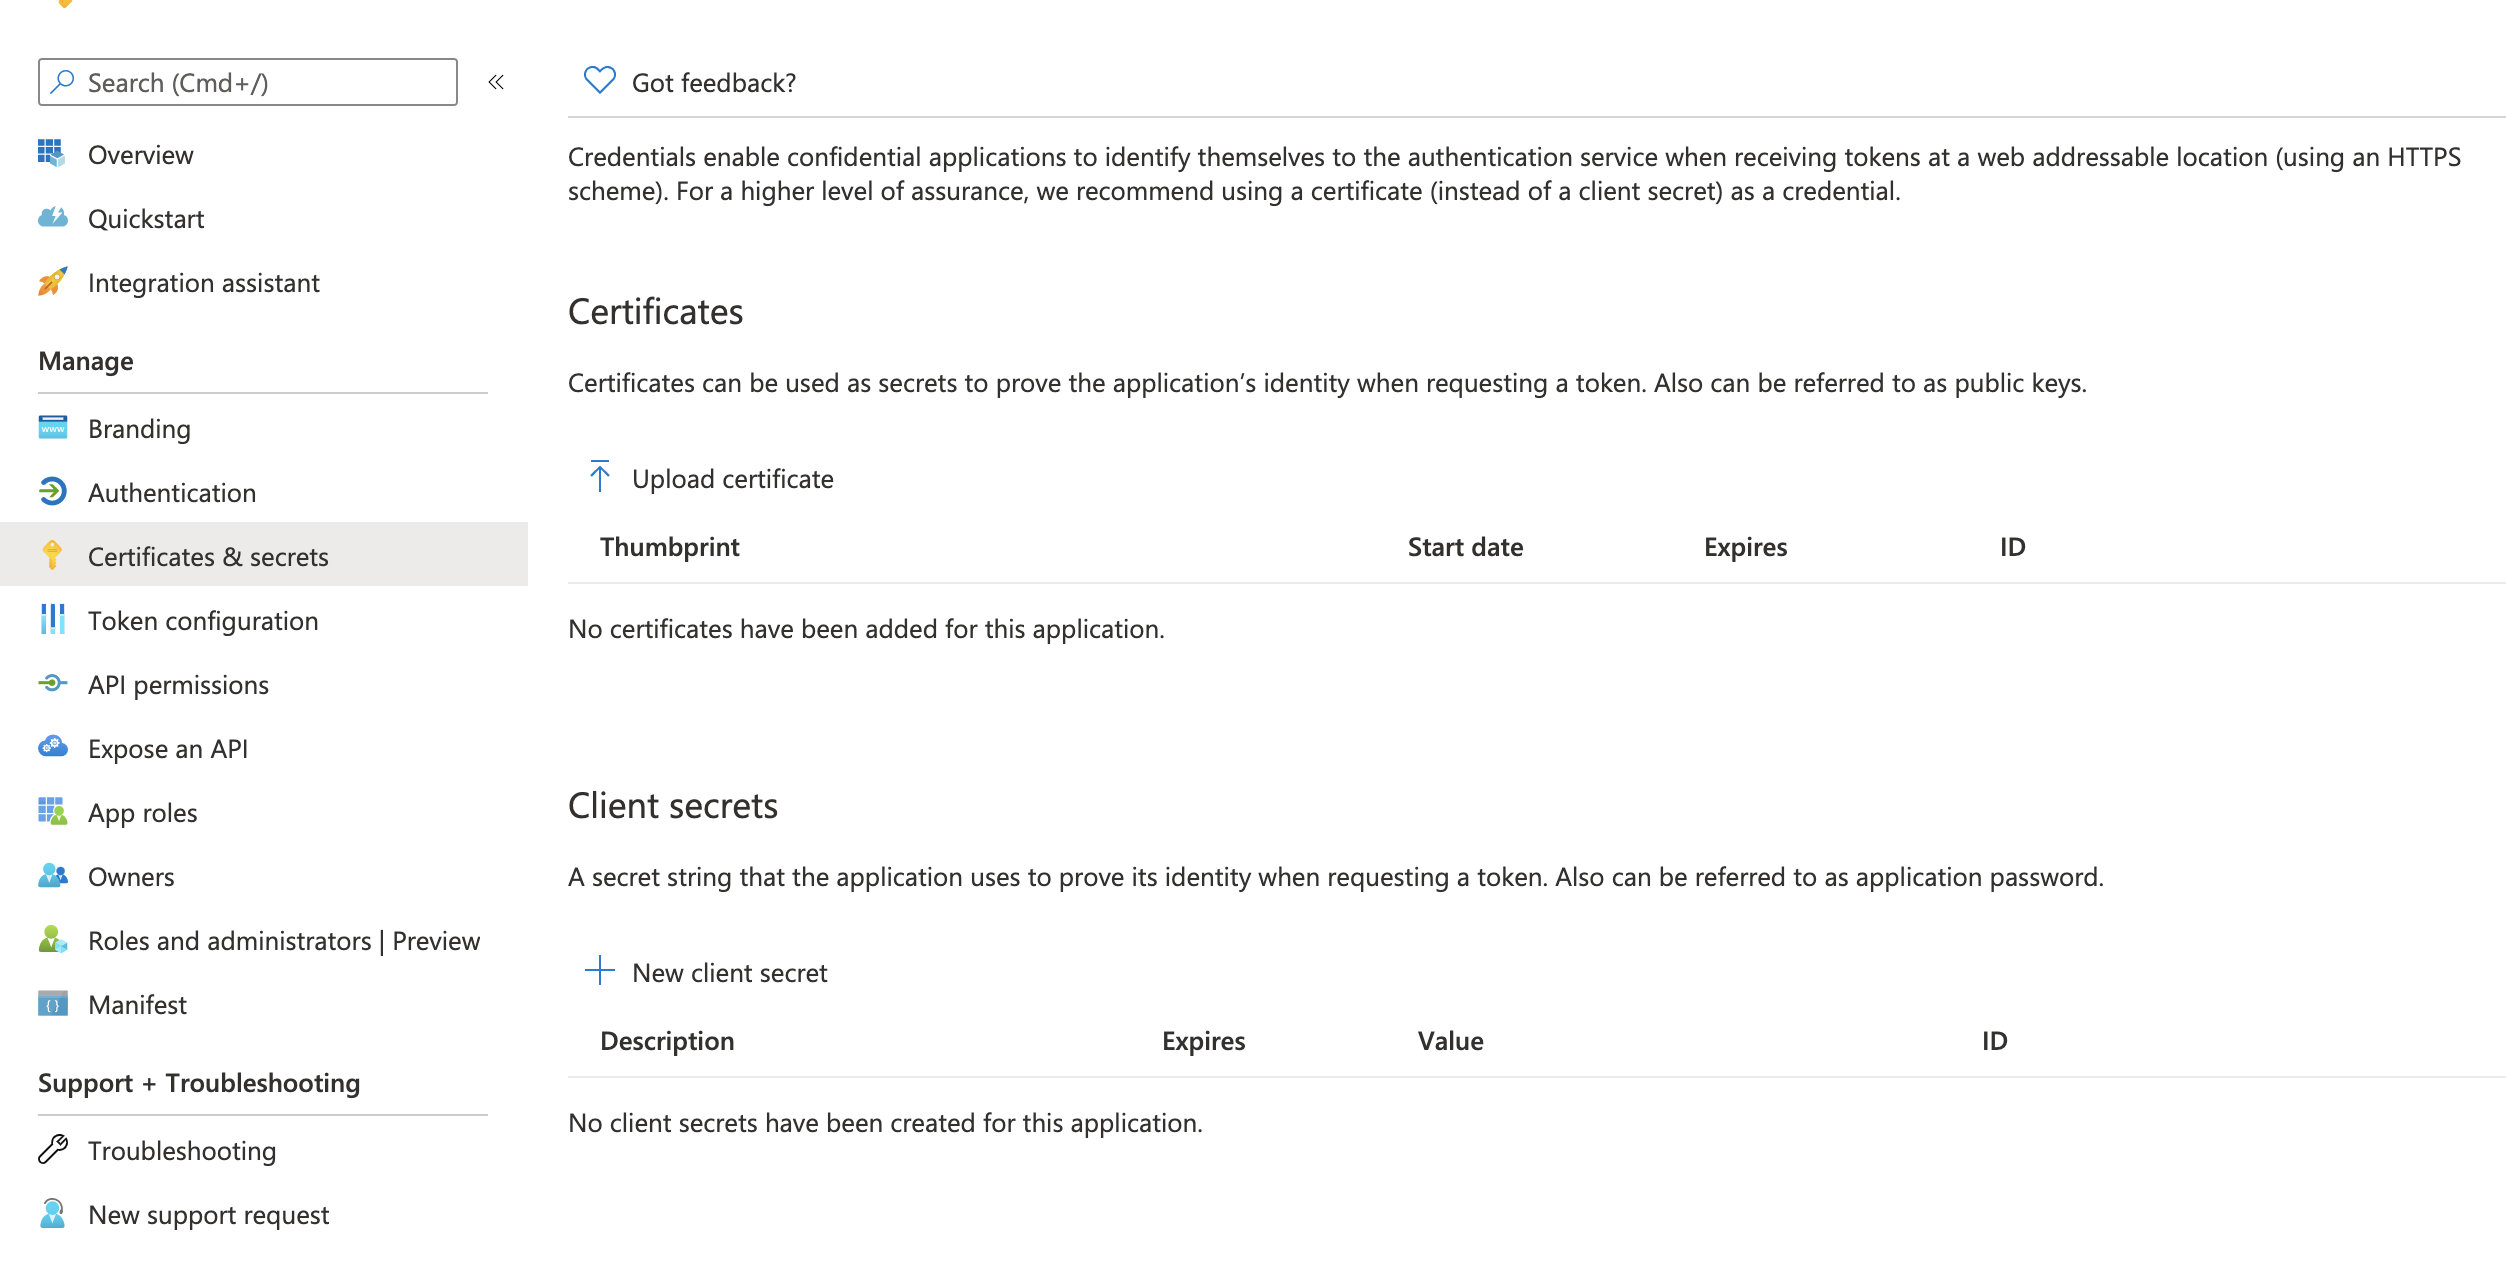
3) Under the "Certificates and secrets" tab, you will configure a new Client Secret (this is the OAuth Client Secret used for the integration):

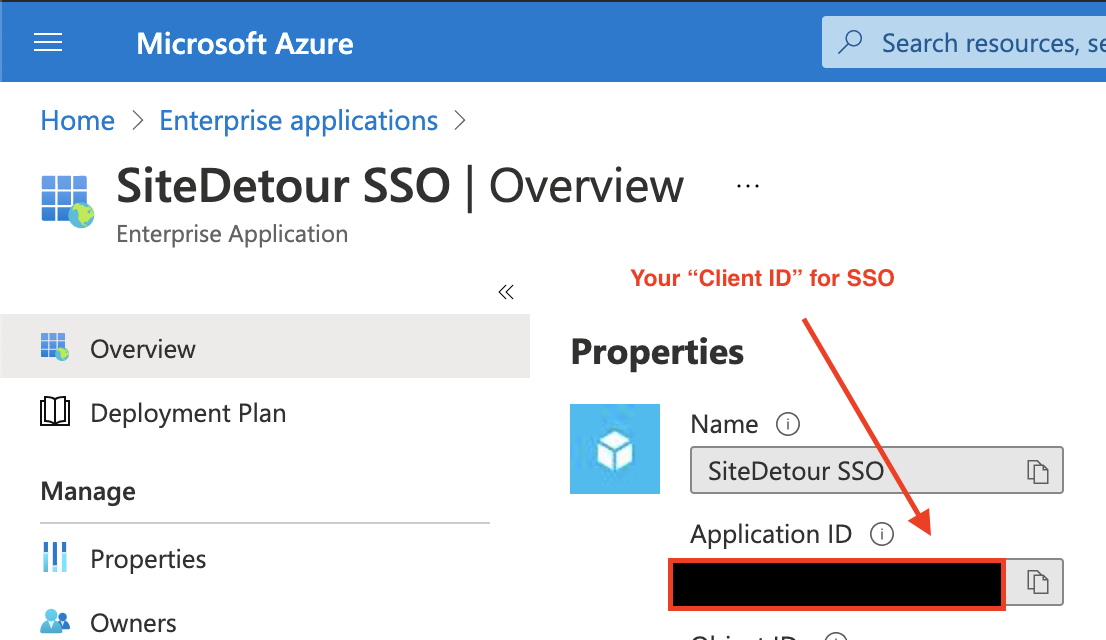
4) The Client ID is the Enterprise Application ID, found on the Overview tab of your newly created Enterprise Application:

5) In addition, you will need to configure the Enterprise App with a reply/redirect URL.

The value that should be used for your account is accessible via the SiteDetour console SSO configuration page. Please copy the reply URL that is exposed and store it in the Azure Enterprise App reply URL setting.
Updating SiteDetour SSO Configuration
Once you have successfully configured an Azure Enterprise Application for the integration, the final step is to update your SiteDetour organization's SSO configuration in order to enable Single Sign On. To update your organization's SSO configuration, please sign in and visit the SiteDetour SSO page. You will need to carry over the Client ID and Client Secret values obtained in earlier steps.
- Your Client ID is obtained in step 4 of the previous section. The Client ID is listed as the Application ID within the Azure Enterprise App page.
- Your Client Secret is obtained in step 3 of the previous section. The Client Secret is added under the Certificates and secrets section of the Azure Enterprise App settings page.

Troubleshooting
If you have any issues while configuring SSO, please feel free to reach out to our support team via our Support page or Contact page.


